of the
25 HP Swan Restoration
Continued...
See
Page 1, Page 2, Page 3, Page 4, Page 5, Page 6, Page 7, Page 8, Page 9, Page 10,
for more of the 25 HP Swan Restoration project.


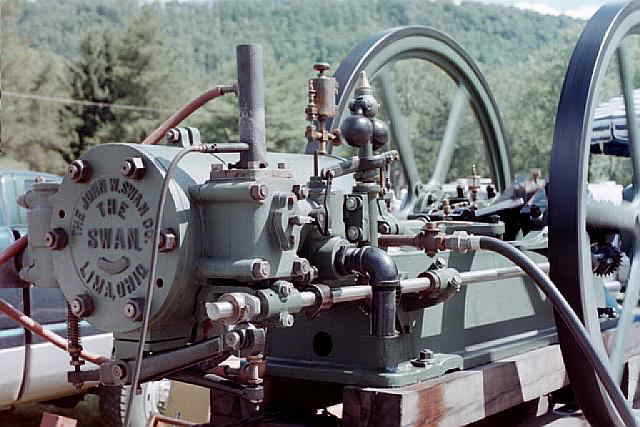
After a few good coats of primer the intake assembly gets some black paint...

This is what the intake pipe and choke plate look like all assembled on the engine. Now I will be able to adjust the choke when I get ready to start the Swan for the first time...


In the following 3 photos the flywheel rims have gotten thier first coat of black paint. This is after applying 4 coats of green paint to the rest of the flywheels. Every little thing that gets completed gets me that much closer to starting the Swan...


The exhaust valve chest was a little to big for any of my tooling so I had to take it to a friends shop for the machining of the valve seat. In the first photo you can see the set up in a bridgeport, vertical mill. The second photo shows the custom tool made for machining the seat. Notice the pilot that picks up on the valve guide...


It is hard to see in this photo with the lighting and how far into the exhaust valve chest the seat is, but you can see most of the seat, which came out real good. Now I will grind the seat and get the valve ready for lapping...

The exhaust valve chest finally makes it on to the engine. With the valve lapped in and all the gaskets cut the valve chest is ready for assembly. This is the last and final step to be completed before running the Swan for the first time in about 54 years. Note, the outside cover plate is not on the valve chest in these 2 photos...


In this photo the exhaust valve chest is all assembled with the outside cover plate in place. What is this engine going to sound like?...

Nuts get loosened back up and the exhaust valve chest gets its first coat of primer. There is one more thing to check and that is the profile of the exhaust cam. Now that I have the exhaust valve in the valve chest, I can turn the engine over and make sure the valves are all opening and closing when they should. Also notice the propane is all hooked up to the engine and the hot tube in these last couple of photos...

The Swan Lives!
The following photos where taken on September 17, 1999 right after I shut the Swan off from running her for about 20 minutes. This is the first time in 54 years that the flywheels have turned under there own power! After starting and running her for a few minutes I blew the top cover gasket on the exhaust valve chest. The engine was still running fine with the gasket blown, so I kept her running.I remachined the top cover in the lathe and there is no question of the surface quality now. In the last photo here, there are no words that can describe how I felt that day! I hope those following the Swan project have enjoyed it as much as I have!...


Starting with the fall swap meet at the Coolspring Power Museum in October of 1999, I took the swan onto the show curcuit. Boy has it been a fun time traveling to all the shows and running the Swan. People that come up and watch the Swan running have given me a lot of nice comments on the engine. I have to say that at the shows running the engine, I feel pretty proud of the Swan. Below are (4) photos of the Swan at a couple of shows. The first (2) are from the Port Allegany show in July of 2000, and the second (2) are from the Alexander Steam show in September of 2000, coutesy of Harry Matthews...


To watch and listen to a video of the Swan running, check this file out.
Swan Video
This video is about 30 seconds long and has a file size of 794K.
You will need a player that is capable of playing Real Audio files. If you don't have this capability check out the Real Audio homepage.
I would like to thank Bill Tremel for making this Real Audio file of the Swan possible. Thanks Bill...
For those interested I have a 4 hour long video of the entire restoration of the 25 HP Swan. The video includes getting the engine home to Pavilion, NY, and also getting her into the shop for restoration. Then everything from fabricating parts, machining the parts, pouring babbitt, and then the first running of the engine. Everything you have seen on these webpages of the 25 HP Swan restoration is on this video and more. Please contact me using the e-mail address below if your are interested in getting a copy of the video. Thank you.
See
Page 1, Page 2, Page 3, Page 4, Page 5, Page 6, Page 7, Page 8, Page 9, Page 10,
for more of the 25 HP Swan Restoration project.
 |
Antique Gas Engine WebSite |
|
 Website designed and maintained by , Pavilion, NY.
Lunarpages Affiliate Program

Registered User #157284
Sun, Sparc, Ultra60 running Aurora 1.0 (RedHat Linux 7.3)
in mind, and are meant entirely for fun. No copyright infringements (if any) are done intentionally.